- (888) 764-0688
- [email protected]
- 24-hour Phone Support
Find out about how to share your Microsoft Outlook Calendars with others to have them directly view it for convenience. They may be able to view or edit your calendar depending on what permissions you provide them. You may also publish your Outlook Calendar and share it with others by sending them a link to a webpage or a file.


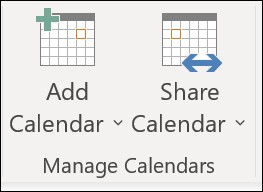
Select “Share Calendar” on the “Home” menu from your “Calendar” folder.
Select the Calendar that you would like to share.
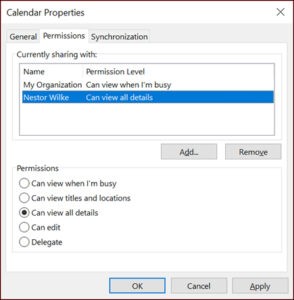
Click “Add” from the “Calendar Properties” dialog box.
Search for individuals from your address book or type in their email addresses in the Add box. Once you have added names in the “Add Users” dialog box, click “OK“.

Select the individuals name or email address in the Calendars Properties dialog box and choose the amount of detail you would like to share with the individual then click “OK“.
A sharing email invitation will then be sent to the individual you have decide to share your calendar with.
The receipt will then have to click “Accept” and then will be able to see your shared calendar on their list.
So long as you have access to a web server that supports the World Wide Web Distributed Authoring and Versioning (WebDAV) protocol you may publish your calendar on the server.

Select “Calendar” then click “Home“, “Publish Online“, and “Publish to WebDAV Server“.
Enter the Location of the WebDAV server in the “Location” box. Select any other publishing options you would like, and then click “OK“.
You can email a static copy of your calendar for a specific range of dates, If you do not want to provide someone any permissions to share your calendar. The recipient will see the events on your outlook calendar only at the time you send that email. (Note: Anything added to your calendar after you’ve sent the email will not be seen by the recipient so you would have to resend an email with the calendar to do so.)
Click “Calendar” then “Home“, and “Email Calendar“.

In the “Calendar” and “Date Range” boxes, select the calendar and time frame you would like to share.
Set any of the other options you want, and then click “OK“.
Add who you would like the message to go in the “To” field in the new email that opens, and add a message if you would like too and click “Send“.
The person you sent your calendar to see a snapchat of your calendar in the message.
You can deny access to your calendar at any point and time. (Note: It make take a while for Microsoft 365 and the user’s Outlook to sync and remove the view to your calendar.)
Click “Calendar“, “Home“, and “Calendar Permissions“.
Click the user’s name and then choose “Remove“, on the “Permissions” tab and click “OK“.
If this error is displayed these are the possible reasons why
If the option to share your calendar is not shown, is not available or it’s greyed out, it is because the admin/IT support for your business has set a policy to prevent the people from sharing calendars.